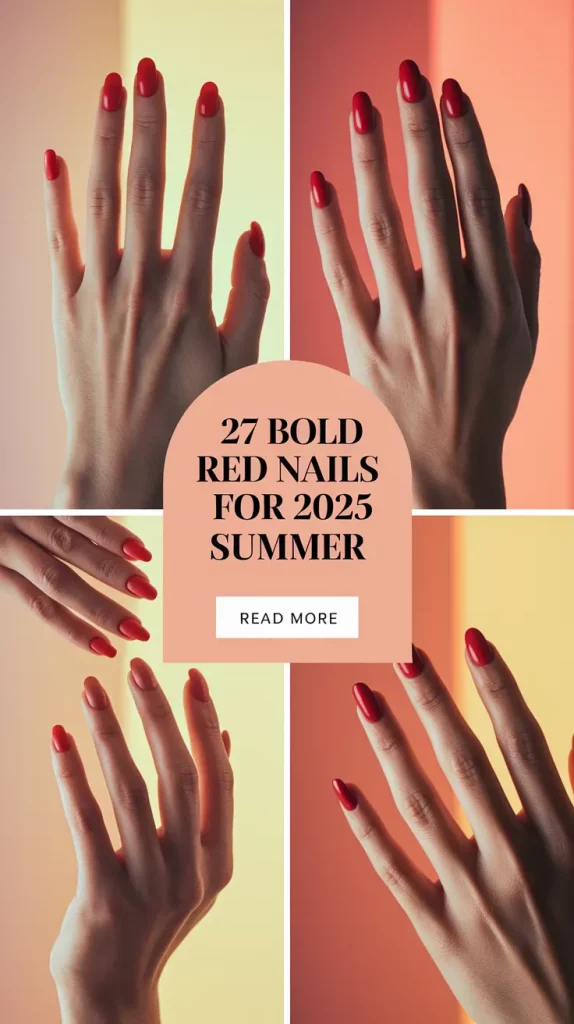
Is there anything more classic—and at the same time, cool—than a red nail polish on your fingers? As we step into summer 2025, bright colors are still going to be a big part of what we wear. But this season, it’s not just about red; it’s about how you wear it. Glossy, matte, almond-shaped, squared off, painted with florals, or paired with leopard print—bold red nails are really popular right now, and they look both classic and creative at the same time. So, whether you’re craving bold red nails short and playful or going full glam with bold red nails acrylic, let’s talk inspiration. The kind that makes your fingertips look like they were picked for a magazine ad.
Below, you’ll find some examples that show how this trend is being used in real life. Each one tells a story and sets a certain feeling, just like what you want to feel during your summer days.
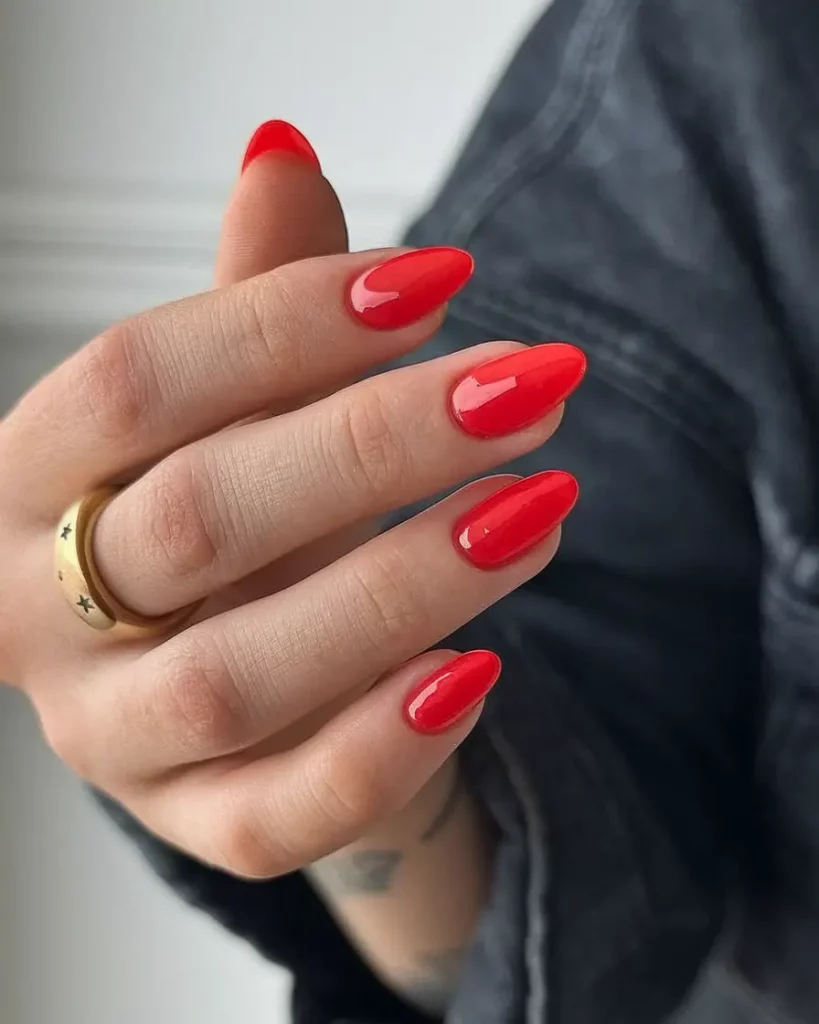
Classic Almond Gloss for Timeless Power
There’s something really appealing about a simple, shiny almond shape in a bright red that makes you want to touch it. This design doesn’t need fancy details, but it looks strong and sure of itself. The elongated shape makes it look elegant, while the bright color shows it’s in charge. This is the kind of bold red nails look that goes well with your work clothes or even a glass of wine when you sit outside.
![]()
To get this look, I usually pick out OPI’s “Big Apple Red” or CND Shellac’s “Wildfire” because they give my nails a really shiny and long-lasting finish. You’ll also want a great almond shape file (I use the ORLY Black Board) and a high-gloss top coat like Essie’s “Gel Setter.” It’s all about getting that mirror finish.
Start by shaping your nails into a soft almond shape, then put on a base coat of nail polish to help the other layers stick better. Two coats of red polish usually look great, but make sure you let each one dry completely before adding the next. Don’t forget to seal the tips and lock everything in with a quick-drying top coat. Want it to last longer? A UV lamp helps.
Personally, this is the look I go for when I want to look nice without putting too much effort into it. No design distractions, no seasonal tie-ins—just pure, undiluted elegance. These are bold red almond nails that show off a confident and put-together look.
Leopard Drama in Red and Black
Wild at heart? This fierce combo of shiny red and matte black leopard print adds a bold look without being too over the top. It’s short, to the point, and just how I imagine a night out on the rooftop. The design switches between plain lacquer and patterned nails, so it looks cool and easy to wear at the same time. Hello, bold black and red nails.
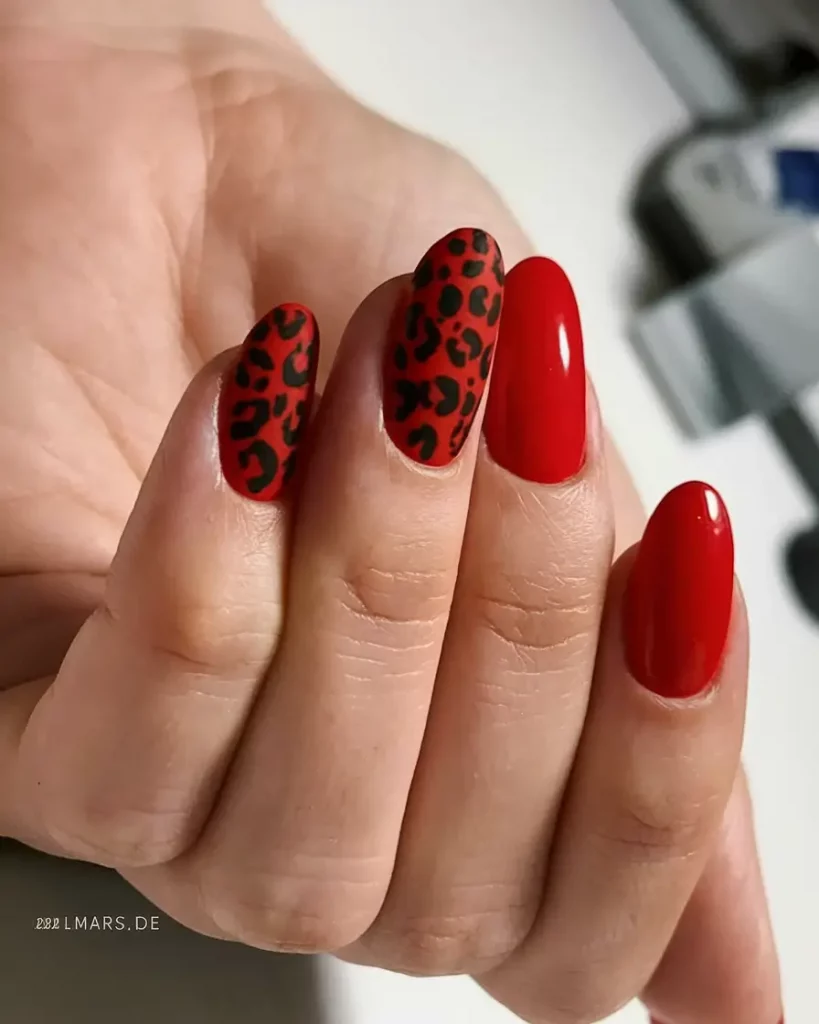
For the base, I’ve found that using Beetles Gel Polish in “Spicy Red” works well. For the leopard spots, use a small detail brush and some matte black nail polish. I like using the Le Mini Macaron brush because it helps you get really neat spots. A matte top coat over the spots helps the whole look stand out more by making it look softer and more interesting.
To DIY this look, start by painting your nails red with two coats of polish. On the accent nails, wait for the red base to dry completely, then use a small brush to add some black spots here and there, making sure some are hollow and some are solid. It doesn’t need to be perfect. That’s the point. Once your nails are dry, put on a clear matte top coat on your nails, and then add a layer of gloss on the rest of your nails.
If I’m being honest, I felt a bit more confident when I put this dress on. And that’s kind of the point. These are bold red nails that make a statement—they’re loud, a bit edgy, and really stand out when you want your nails to say something.
Playful Daisies Over Classic Red
Fresh, flirty, and surprisingly easy to wear—this happy daisy design is a great way to show off your summer style. Layered on top of a bright red background, the white petals and black centers help tone down the boldness and make it feel a bit softer. It’s youthful without being juvenile and totally Pinterest-ready. A cute way to do bold red nails if you want something a little more playful and fun.
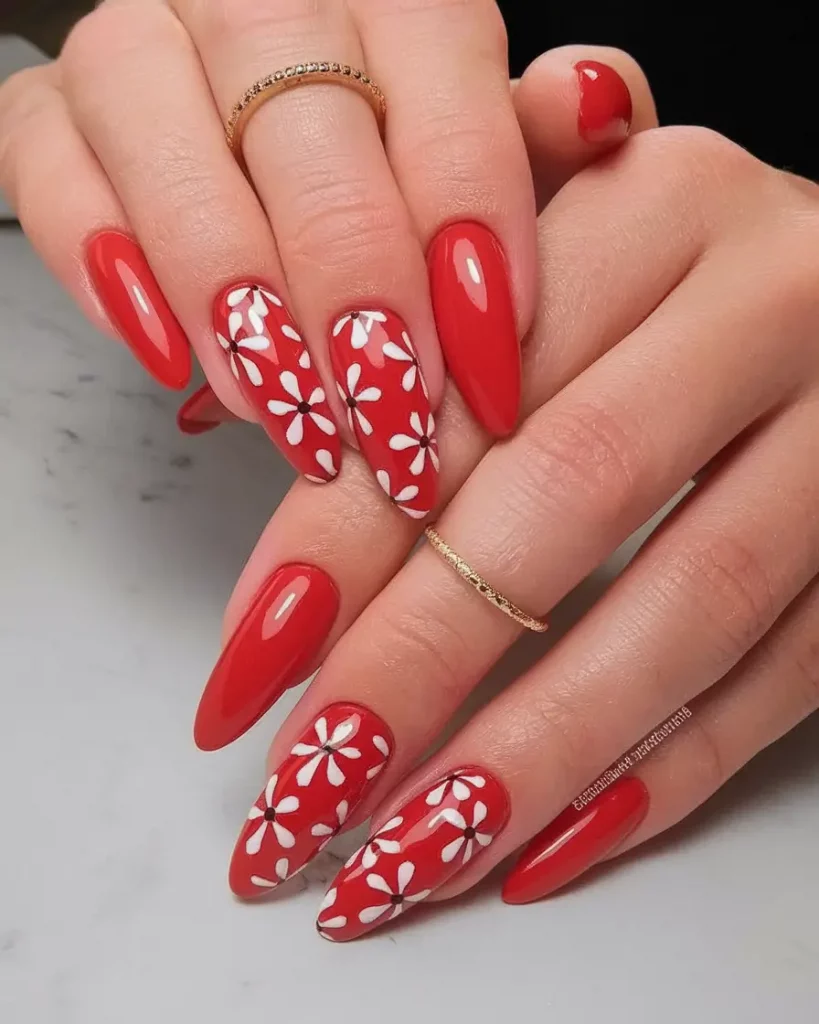
You can get this look with a bright cherry red nail polish, like the shade called “Cherry Flame” from Lights Lacquer. Use a dotting tool or the tip of a bobby pin for the petals (I’ve used the Olive & June nail art tool kit and loved it). A simple black dot in the center gives the nail more depth and makes it look a bit more interesting.
Start with your base color—two solid coats of red. Let it cure fully before adding the flowers. You don’t need to be exact; In fact, the way the buildings are spread out is what makes the place so charming. Finish with a clear coat on top to make everything look shiny and new.
I wore these for a weekend brunch with friends, and three people asked me where I got them done. That’s what I love about bold red nails—they sparkle and get people to notice them. And this design? It’s basically summer in bloom.
Neon Red for a Bright Summer Pop
This one looks more like a bright coral-red, almost like a juicy pop of color that stands out in the sun. It’s a color that stands out but doesn’t shout at you or look over the top. The round shape makes the sunglasses look a little softer and easier to wear during the day. Think iced lattes, denim jackets, and sunny afternoons. This style definitely falls into the bold red nails short category, and that keeps it looking modern and eye-catching.
For this tone, I like to use “Snap Happy” by Essie or “Flamingo Flame” by DND. Both hit that vibrant red-orange sweet spot. No nail art needed here—the color just makes these nails look great all on its own.
Application-wise, it’s straightforward. Short rounded nails are super wearable and low maintenance. Apply two thin layers of polish, and then finish it off with a really shiny top coat. A cuticle oil finish (like CND Solar Oil) makes it look even more luxe, especially if you’re snapping pics for socials.
This color always makes me feel like I’m on vacation, even when I’m just out buying groceries. It’s fun, easy to use, and can make your nails look neat and put together right away. If you want to try out bold red nails but aren’t sure if you like it yet, this fun version is a good place to start.
Glossy Almonds That Never Miss
This design is what I call an evergreen power manicure—lush, deep red in a perfect almond silhouette, polished to the kind of shine that makes your fingertips feel like jewelry. There’s zero extra embellishment, and yet, it’s quietly stunning. When people say bold red nails acrylic never go out of style, this is exactly what they mean.
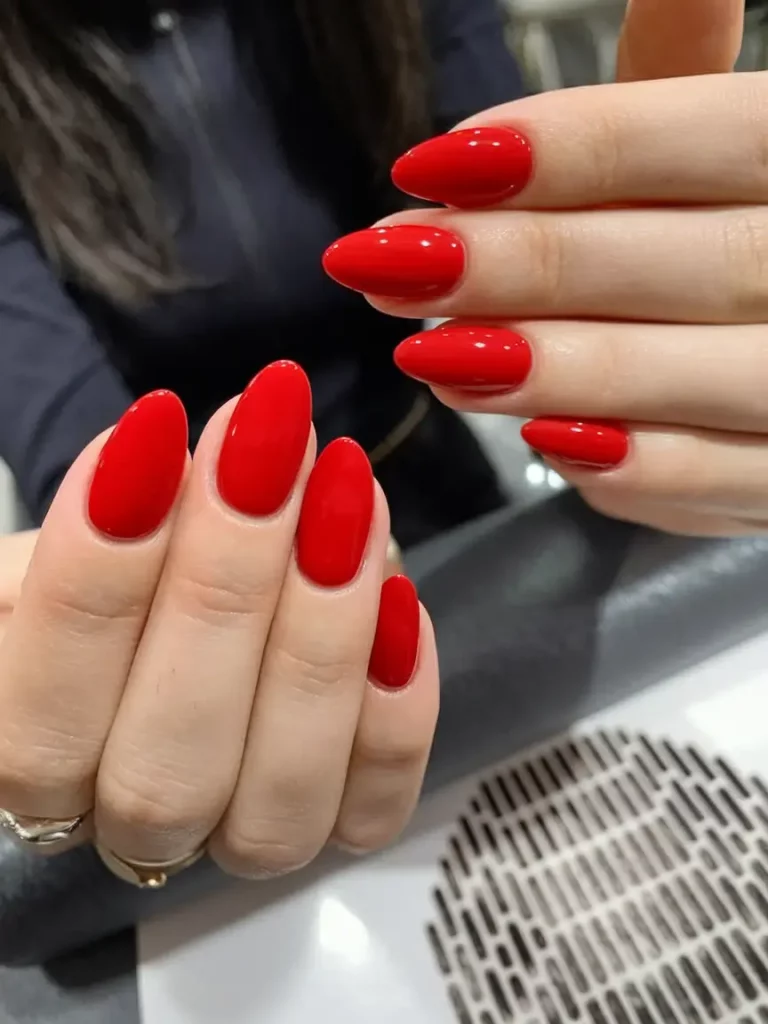
While I love experimenting, I always return to Bio Seaweed Gel’s “Red Hot” or Gelish’s “Hot Rod Red” for this finish. They apply buttery smooth and keep their gloss for weeks. For almond shapes like this, especially on acrylics, I like using a fine-grit file for the finish work and a non-acid primer for better polish grip.
Application-wise, this look doesn’t demand complexity—just consistency. Buff the nail bed, apply base coat, two coats of red, and top it off with a no-wipe gloss top coat. That UV-cured layer makes all the difference. Just don’t rush the curing time—rushed gel turns dull fast.
Whenever I wear this set, it instantly upgrades my whole mood. Red like this feels like your nails are speaking fluently in confidence. A pure bold red nails aesthetic moment, honestly.
Sculpted Marble with Serious Depth
This might be the most unexpectedly elegant look of the summer—deep red with subtle black marbling, all set into a squared-off nail bed. The marble effect isn’t loud or chaotic—it’s moody, controlled, and definitely chic. This is what I imagine a nail look would be for a fashion editor at a gallery opening. It hits the sweet spot between bold red square nails and wearable art.
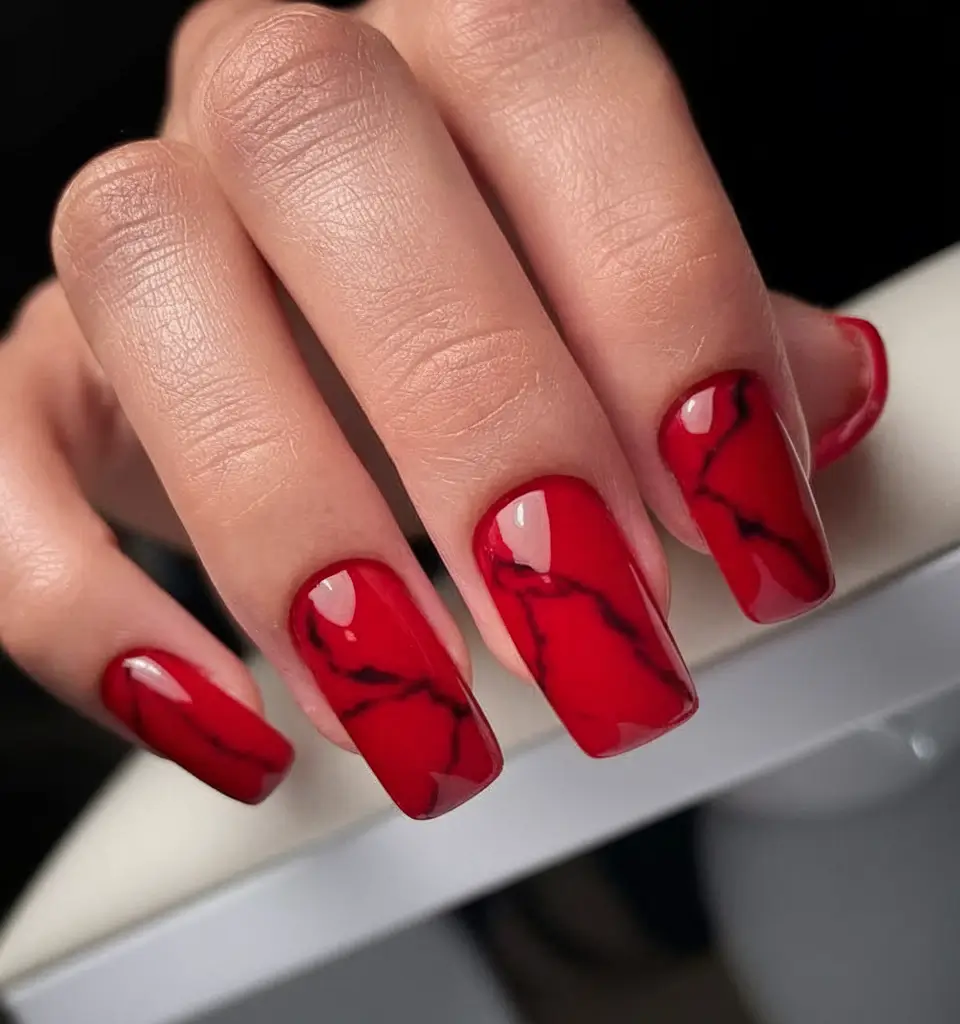
To create that translucent depth, I’ve seen amazing results using The Gel Bottle’s “Ruby Red” layered with a thin black liner swirled lightly before curing. That swirl effect? It works best when dragged lightly through semi-wet gel—less is more here. Seal with a top coat that enhances contrast, like Orly’s “Shining Armor.”
This one’s a little more advanced to DIY. After prepping and painting your red base, use a super-thin brush to add irregular black lines—don’t overthink the placement. Then, lightly feather through them with a liner brush or a bit of acetone for a watercolor effect. Cure immediately, or the lines may bleed too much.
Every time I’ve worn this style, I’ve had strangers ask where I got them done. It’s edgy but still elevated. These bold dark red nails have just enough mystique for evenings but still work with a day dress.
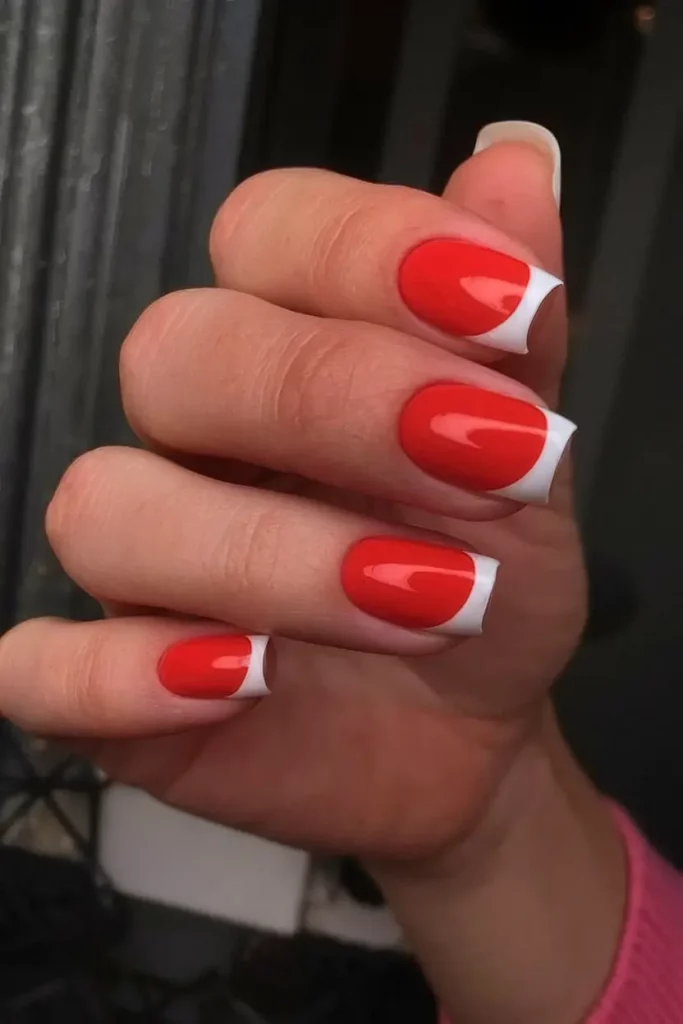
Retro Red Meets Modern French
Here’s a modern remix on a retro favorite: vibrant red with a crisp white French tip, only flipped with a reverse arc. It’s nostalgic and bold at once—like a 2000s reboot with a twist. What I adore here is how it plays with geometry while still feeling playful. This falls firmly under bold red french tip nails, but with a quirky, unexpected spin.
To get those perfect curves, I recommend striping tape or a French curve stencil (Maniology has some great ones). A bright red like “Color Club’s Mamba” paired with white gel paint will give you sharp contrast that’s totally summer-appropriate.
You’ll want to begin with red polish on the lower 3/4 of the nail and let it cure fully. Then, using your stencil or a precision brush, create that clean crescent in white near the tips. It’s a small detail, but it makes a big impact. Finish with a super-shiny top coat—this one thrives in high gloss.
I wore a version of this during a friend’s bridal shower weekend, and it somehow looked good with every outfit I packed. These nails are trendy without trying too hard—and they give off total cool-girl vibes.
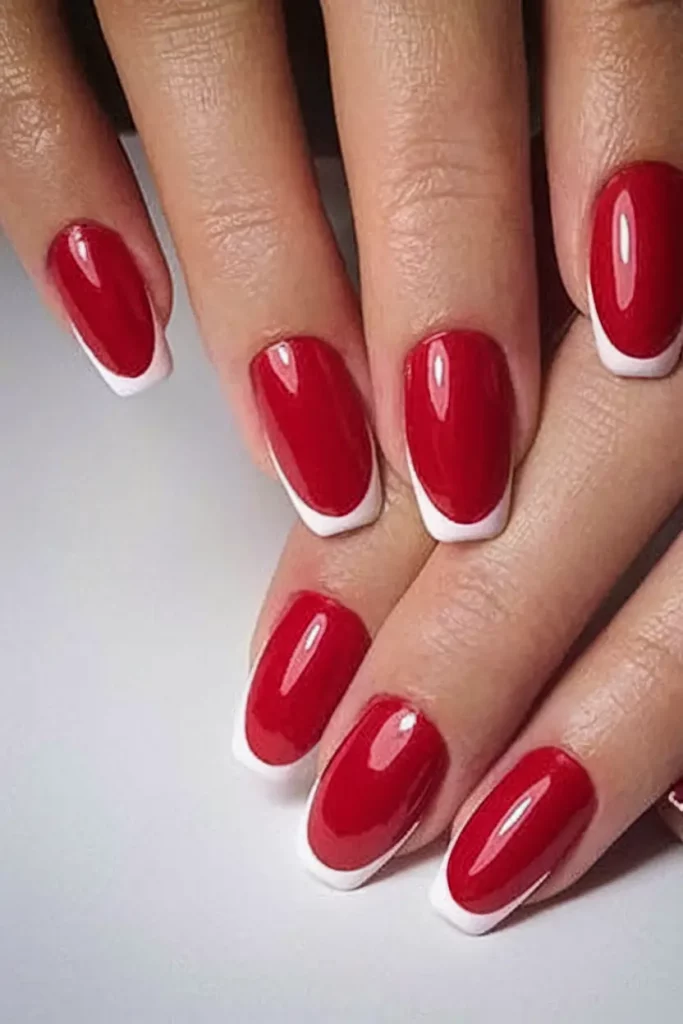
Minimal French with Almond Elegance
If I could bottle up the phrase “summer sophistication,” it would look like this design. Almond-shaped bold red nails edged in delicate white French tips—it’s subtle, timeless, and just a little luxurious. This version feels softer than your typical French manicure, thanks to the rounded shape and thin white border.
You don’t need fancy tech to recreate this—just a steady hand. I’ve used Essie’s “Forever Yummy” for the red and OPI’s “Alpine Snow” for the tips. A thin striping brush and patience are your best friends here.
After applying your red base, let it cure and then paint the tips with your white polish. The key is to follow the natural curve of your nail shape—don’t fight it. It doesn’t have to be symmetrical on every finger; organic is beautiful.
There’s a reason this combo never falls out of trend. These bold red french tip nails walk that line between bold and bridal, minimal and luxe. And the almond shape makes your fingers look extra elegant—something I always appreciate in close-up summer selfies.
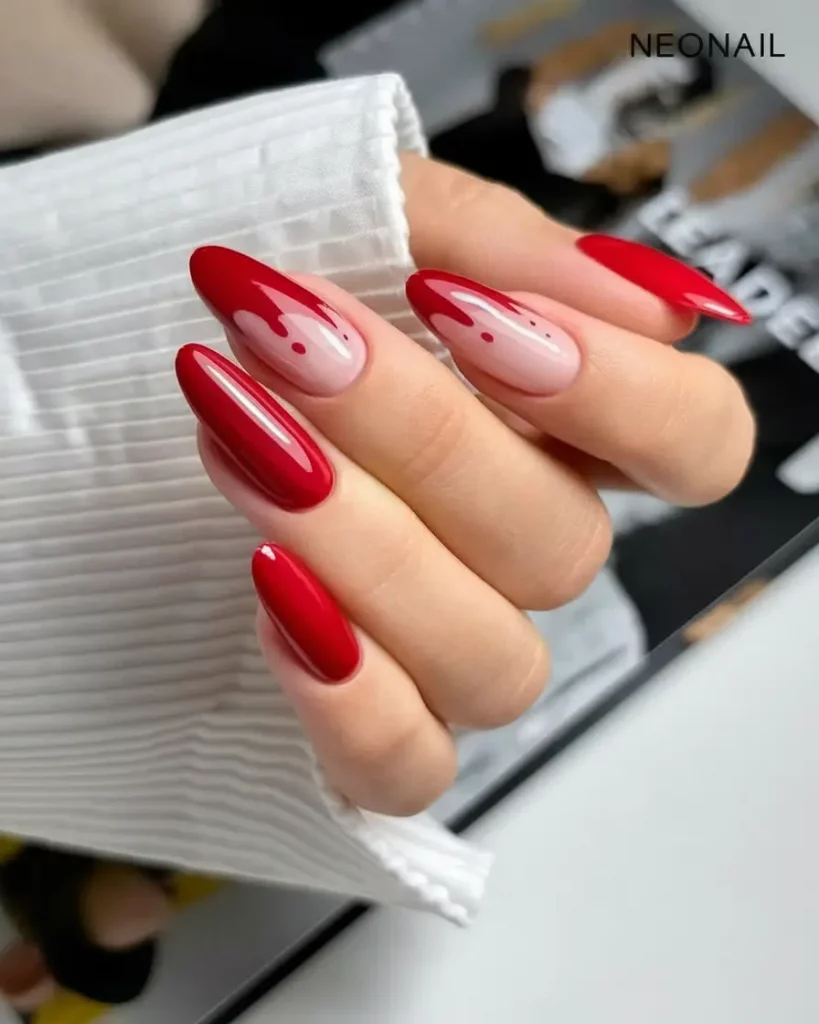
Glossy Ombre With Jelly Pink Fade
Now here’s where red nails get unexpectedly artistic. This set fades from a deep red into a translucent jelly pink, topped off with little red accents that look almost like watercolor drops. It’s a soft twist on intensity—and I’m obsessed. This leans toward bold berry red nails, but the ombre adds a delicate balance that softens the whole aesthetic.
For that rich-to-sheer transition, you’ll need a highly pigmented red (like Neonail’s “Heartbreaker”) and a soft pink jelly shade. Nail sponges help with blending, or you can use a dry-brush ombre method. The red dot accents can be done with a dotting tool or the end of a small nail art brush.
Start by painting a thin layer of pink across the nail, then blend the red down from the tips. It’s a gradual fade, so take your time with light dabs of polish and build up opacity. After that, apply your dot detail and finish with a glossy top coat to unify the gradient.
I’ve only done this once before, but it completely surprised me with how soft and striking it looked in real life. It’s artsy without being loud—something I think more bold red nails could lean into this year.
Romantic Accents with Tiny Heart Charms
This look captures that carefree, heart-eyed summer energy. Classic glossy red on almond-shaped nails takes a sweet turn with a nude accent nail, painted with two dainty red hearts. It’s simple, clean, and instantly charming. Think of it as a love letter, but for your hands. This is a great fit for bold red almond nails, and especially sweet for date nights or summer events.
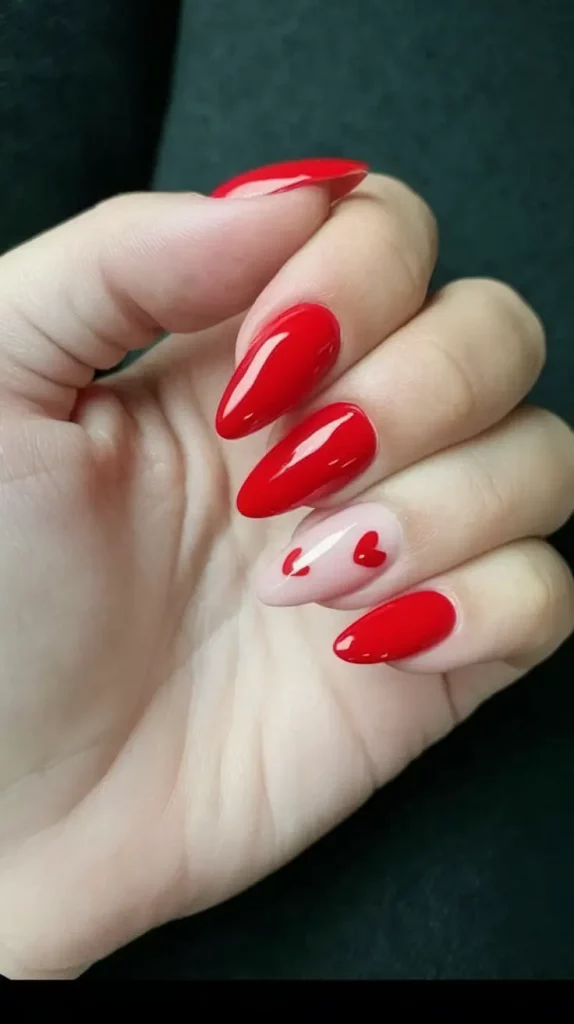
For the base red, “Scarlet Starlet” by Deborah Lippmann gives that rich, even coat. The hearts can be created using a dotting tool and a fine detail brush—Gelish’s “Red Roses” works beautifully for the design. A sheer pink like “Ballet Slippers” gives the nude nail that soft-glow finish.
After your base colors are fully cured, use a thin brush to draw symmetrical heart shapes (or even stickers if you’re short on time). Seal everything with a gel top coat to smooth and preserve the art.
I once wore this style for Valentine’s week, but honestly? It works anytime you want to feel a little more in love—with yourself, or someone else. It’s subtle but personal—nails that whisper, not shout.
Tropical Floral Meets Modern Chic
This floral interpretation brings white, red, and a soft gold accent together in a way that feels both vacation-ready and boardroom-appropriate. The red petals bloom against a white base with tiny metallic details at the center—an unexpected touch that adds elegance. Meanwhile, the glossy bold red nails on the other fingers anchor the whole look in vibrant confidence.
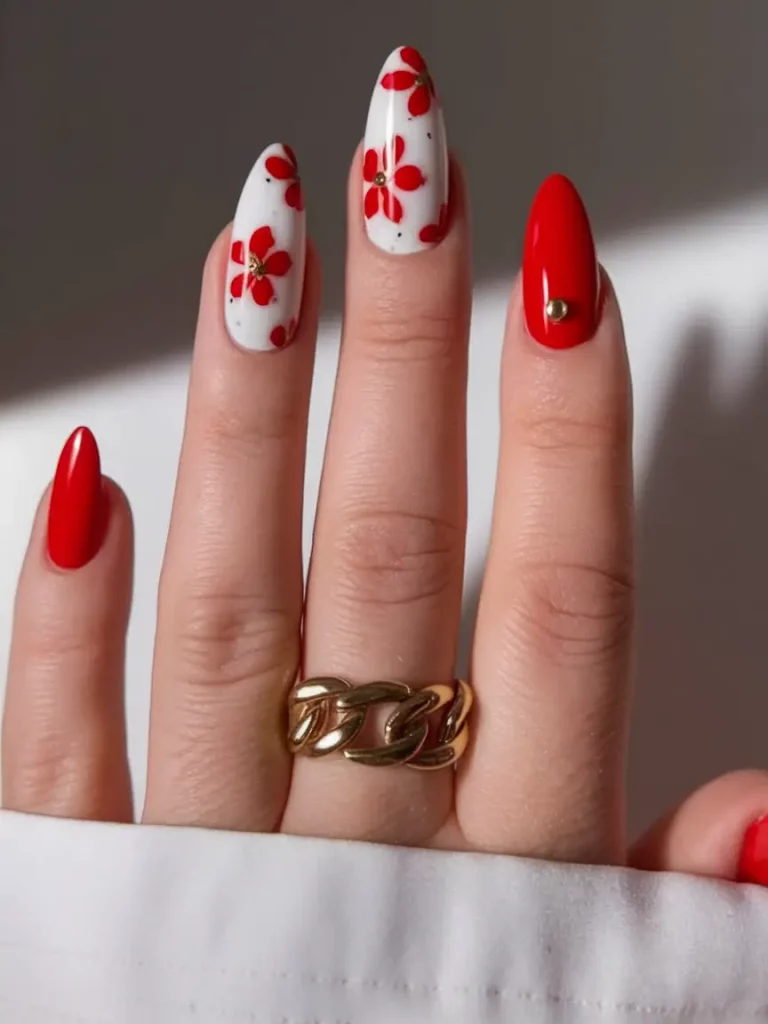
You’ll need a rich red gel (try “Ruby Shimmer” from Madame Glam), a crisp white polish like Essie’s “Blanc,” and gold micro-studs or glitter gel for the flower centers. Nail art brushes are essential for painting the petals with smooth, rounded strokes.
I start with two layers of white on the floral nails. Then, I use a small detailing brush to paint petal shapes in red—five per flower feels just right. Dot the center with a gold touch before sealing it in with top coat.
This is one of those sets that makes me feel like I’m halfway between a beach and a photo shoot. It balances bold red nails design with delicate artistry, and I love how fresh it feels with summer whites or a straw bag.
Kiss Prints & Amor Vibes
This playful design is all about passion—with printed lips, mini hearts, and the word “Amor” scattered across a nude backdrop. Paired with super-glossy square red nails, it’s a full-on declaration of bold energy. This is a clear contender for bold red Christmas nails, but it works just as beautifully for a flirty summer twist on love-themed nails.
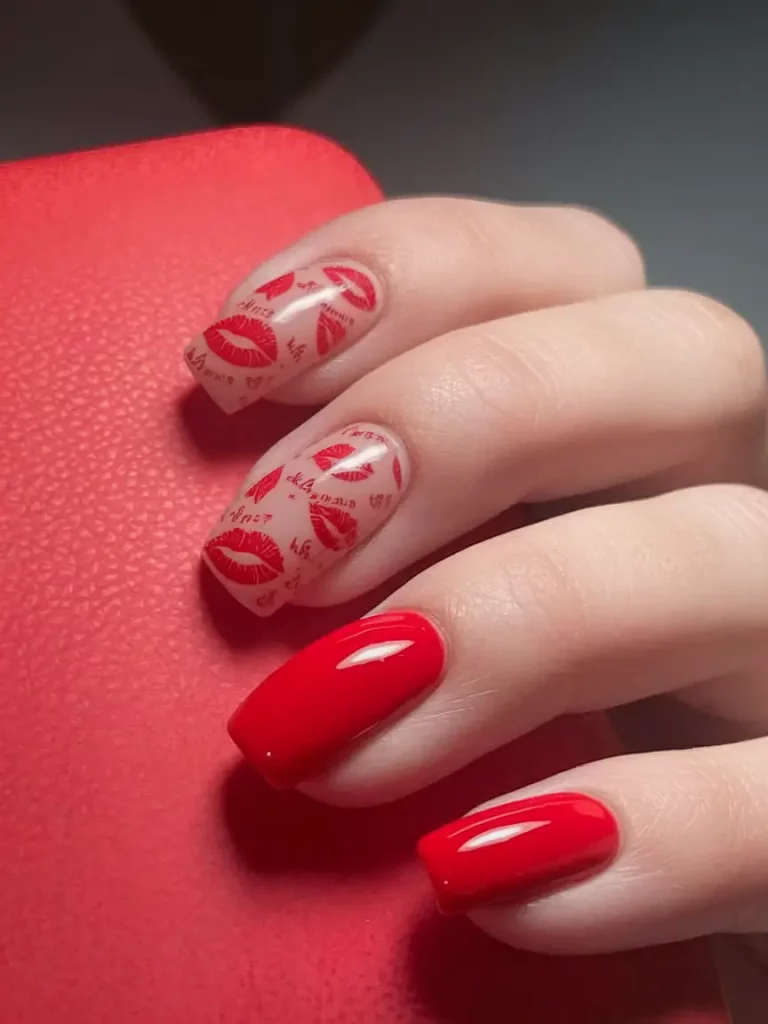
To get the look, you’ll want a stamping plate with kiss and heart motifs, plus a nude base color like “Bare With Me” by Essie. For the print detail, red stamping polish (try Moyra or Maniology) gives the opacity you need to make the artwork pop.
Start with the nude polish on two nails and let it fully dry. Use a stamping tool to transfer the designs cleanly—practice first on paper if you’re new to stamping. The remaining nails get two coats of a vivid red polish and a gel gloss finish for that glassy effect.
This one’s for days when you want to match your nails to your mood—or your lipstick. These bold red square nails are like love notes you wear, and they’re impossible not to notice.
Minimalist Heart on White Accent
There’s a quiet confidence in minimalism, and this nail set knows exactly how to use that. Glossy red across short square nails creates the bold canvas, but it’s that single white nail with a tiny red heart that brings all the charm. It’s modern and effortless—perfect for anyone leaning into bold red nails short but still craving a twist.
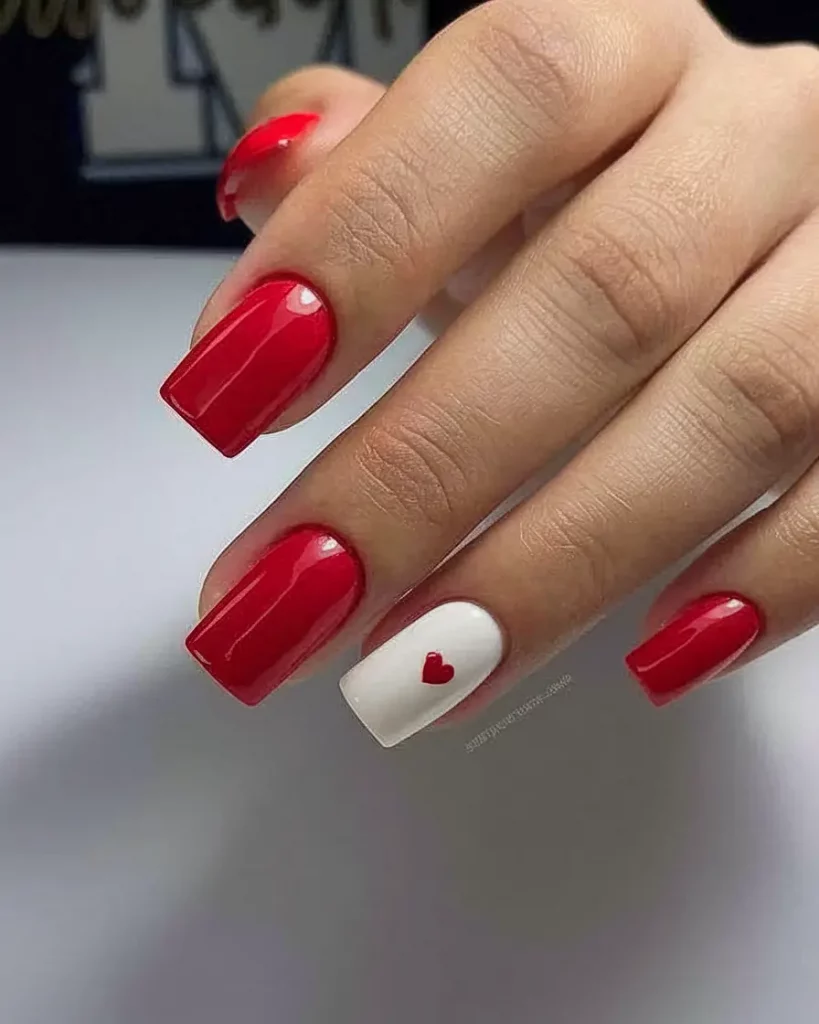
You’ll want a clean, opaque white like “White On” by Sally Hansen, and a bright cherry red for the heart. You can either use a detail brush or opt for small vinyl decals to get that perfectly crisp shape.
Apply your red polish first, then finish with the white accent. Let it dry completely before adding the heart so it stays sharp. Top coat is a must—it’s what keeps the heart from chipping or fading into the background.
This style is the kind I wear when I need a reset—something that still gives that bold red nails aesthetic while staying low-key. It feels fresh, modern, and super wearable for everyday life.
Tiny Black Hearts for Maximum Contrast
This final design is pure fire: long, pointed red nails with a tiny black heart detail near the center. It’s high drama but low effort—an edgy twist on classic glamour. These are bold red nails acrylic at their sassiest, and the mini hearts give just enough surprise to elevate the look without overcomplicating it.
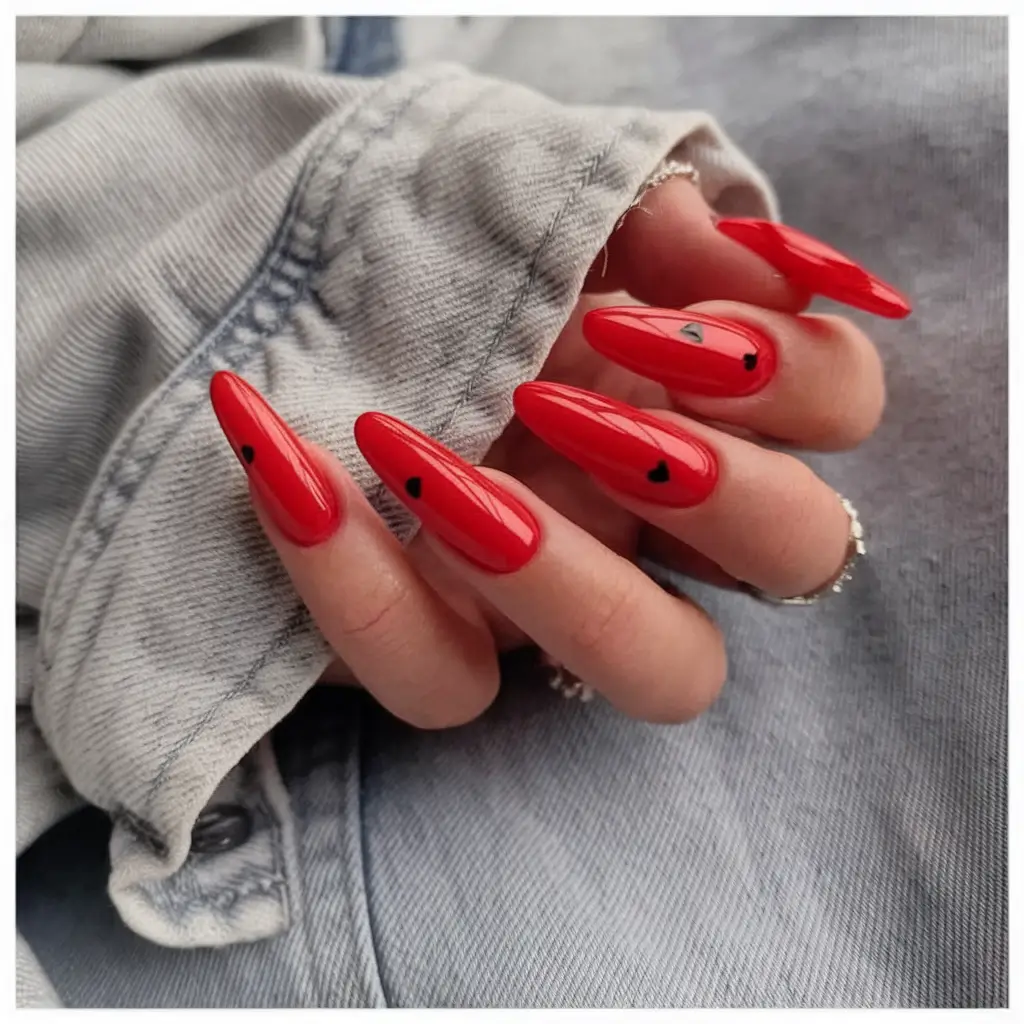
To achieve that finish, I love DND’s “Poppy Field” red—it’s juicy, bold, and glossy. Use a matte black art gel for the tiny hearts. Placement is key: the heart sits about one-third down the nail for maximum contrast.
Start with shaping and base color application. Then, using a super fine brush or dotting tool, paint small black hearts (or even just a dot, if you’re not ready for full hearts). Cure and seal with top coat.
These give me concert energy, date-night glam, and espresso martinis all in one set. It’s bold black and red nails with a side of mystery—and they might just be my favorite way to finish the summer.
Wildflower-Inspired Reds with Olive Accents
This manicure takes two moods—glossy bold red and playful nude with tiny flowers—and blends them seamlessly. The hand-painted red florals and metallic olive green leaves pop beautifully against the pale pink base, giving you summer picnic energy with editorial polish. This is a top contender for bold red nails design with a storytelling twist.
To recreate this look, start with a glossy red like OPI’s “Coca-Cola Red.” For the florals, a dotting tool or micro nail art brush will help you build those petal shapes. Leafy olive green (try “Loden Green” from Lights Lacquer) and a metallic dot for the center (gold or silver) round out the tools you’ll need.
First, apply your base shades—nude pink on accent nails and red on the rest. Once dry, create five-petal red blooms and add leaves along the edges. You can even sprinkle in a few mini dots to mimic dew or pollen.
Every time I wear this combo, it makes my outfit feel instantly more pulled together—even if I’m in sneakers and a denim jacket. The contrast of bold red nails with nature-inspired art always gives me major summer vibe satisfaction.
Matte Petals with a High-Gloss Base
This set blends glossy intensity and matte delicacy—pure white base nails with bold red petal clusters, highlighted by tiny metallic centers. The contrast of textures is a win, and the symmetry of the florals makes it look salon-level pro. These are bold red almond nails at their most artistic.
![]()
You’ll need a cherry red like DND’s “Red Carpet” and a pure white base gel. For the flowers, go with dotting tools and a very fine brush for petal shaping. Tiny gold studs or foil flakes add a luxe finish that’s still easy to DIY.
Paint your white base first, cure, then add floral designs—four to five petals spaced out across the nail. Once the art is done, apply top coat strategically: matte for the base, glossy on the red for a dual finish, or vice versa depending on your style.
I always feel like I’m channeling a bit of runway energy with this one. There’s structure, there’s softness, and the bold red nails aesthetic gets a gorgeous twist when you let the flowers shine.
The Perfect Short and Polished Red
If you’ve ever felt overwhelmed by nail trends but still wanted something bold and clean, this set is your answer. Short, softly rounded red nails with a smooth glossy finish—they’re low-key perfect. Elegant enough for work, spicy enough for weekend plans. Truly a staple in the bold red nails short category.
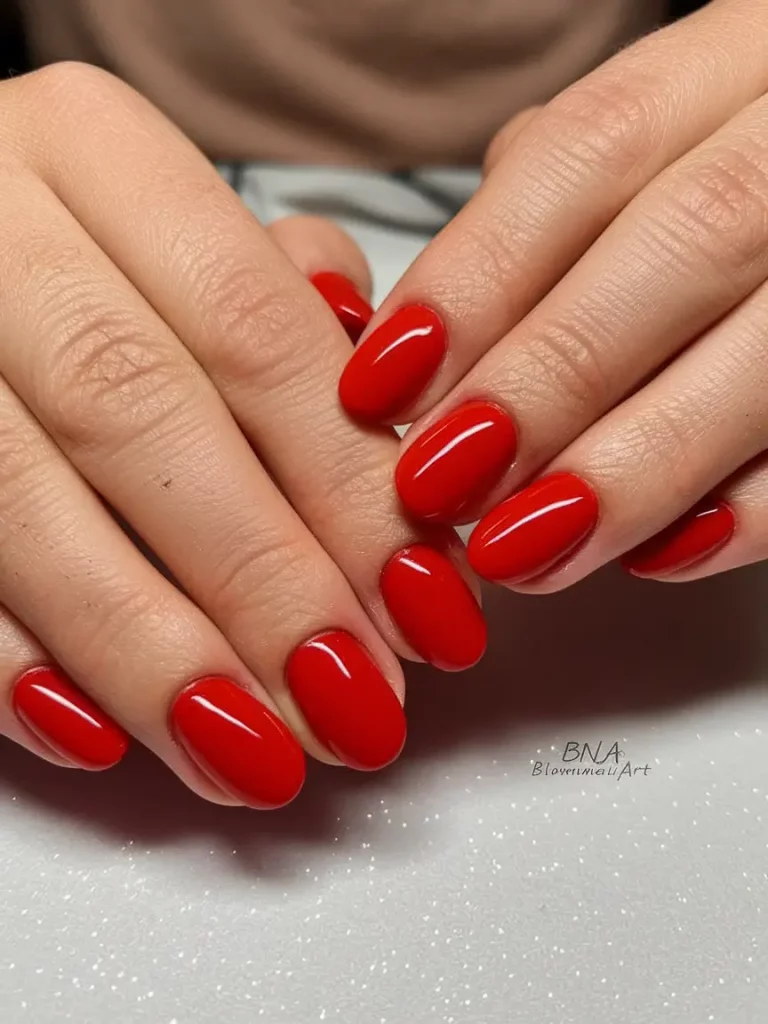
I usually go with “Wildfire” from CND or “Big Apple Red” from OPI for this kind of finish. These formulas give perfect coverage in two coats and won’t streak or dull easily. Short nails look especially great when the cuticles are clean and moisturized, so cuticle oil is your best friend here.
The process couldn’t be easier: shape, buff, apply two coats of polish, seal with a top coat, and oil it up. There’s something so therapeutic about doing this manicure on a Sunday evening.
To me, this style is a non-negotiable. When in doubt? Always go with bold red nails like these. They’re the LBD of manicures.
Cherry Blossoms on Red Canvas
Florals for summer? Groundbreaking—especially when they’re scattered dainty blossoms across a glossy red background. This manicure uses tiny white flowers in clusters, giving the effect of cherry blossom confetti on bold, fiery nails. Equal parts sweet and striking, and totally bold red nails aesthetic.
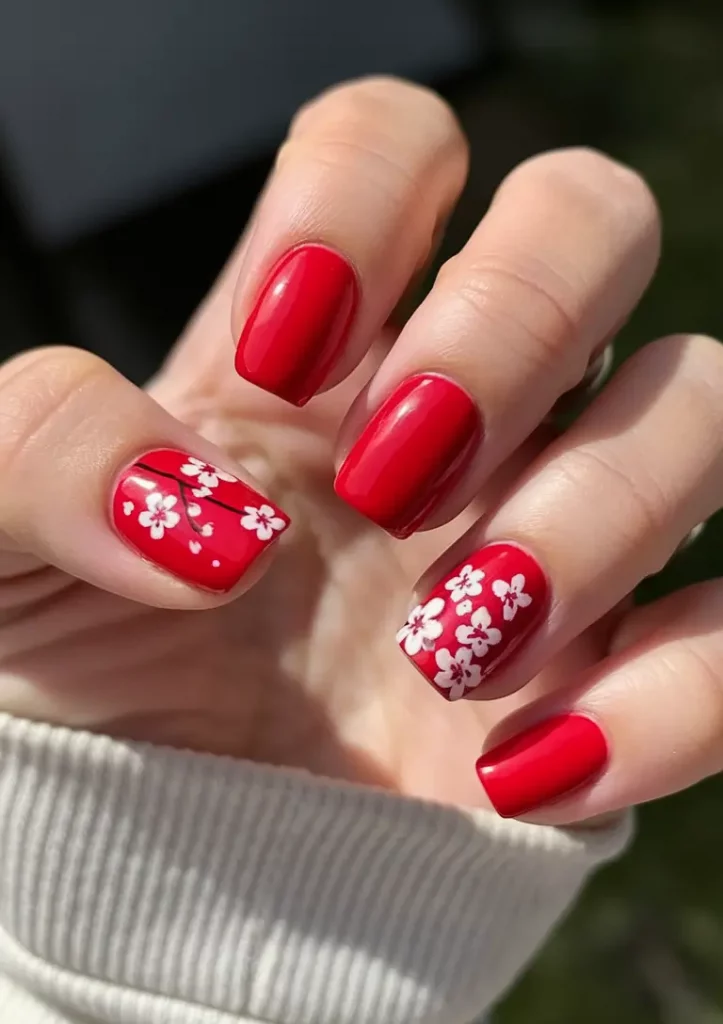
You’ll want a fine-tipped nail art brush or stamping tool for the blooms. “Really Red” by Essie is a great base shade here, while a bright white like Orly’s “White Tips” will make your blossoms pop. You can even use a thin striping brush to add stems or black accents for dimension.
Start with the red base and cure fully. Then delicately place your florals—grouped on two or three nails for balance. A gloss top coat will smooth everything together and lock in the shine.
This is the design I reach for when I want to bring a little softness into my bold. It’s playful but not childish—exactly the kind of manicure that sparks joy on a sunny walk or iced latte date.
White Embroidered Florals on Glossy Red
If classic red nails and lace embroidery had a baby, this would be it. Glossy, squared-off nails with intricate white floral stamping. It’s romantic, detailed, and makes a strong case for bold red Christmas nails, though I’d argue it’s too pretty to wait that long.
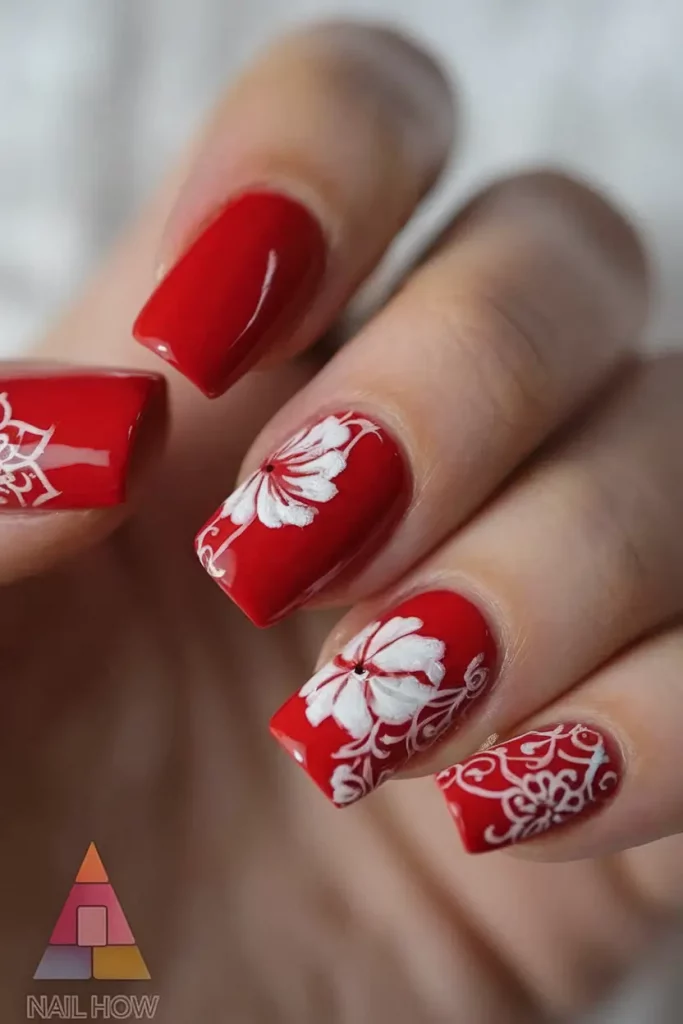
To get this intricate look, a stamping plate is essential. I recommend Moyou London or Born Pretty for reliable floral plates. For polish, “Red Flare” by Bio Seaweed Gel creates a flawless backdrop, while a thick white stamping polish ensures crisp details.
Apply your base polish first and fully cure. Then gently press your floral design onto one or two accent nails—don’t overcrowd. A clear top coat keeps everything in place and adds serious shine.
Every time I’ve tried this look, it ends up feeling like nail couture. These bold red square nails aren’t shy—they’re romantic, elevated, and a guaranteed conversation starter.
Black-Tipped Florals on Fire
This design is all about edge—red meets black in a bold square shape, and the delicate pink flowers creeping along the tip bring just the right amount of softness. The high-gloss finish and sharp black French tips make this a fierce standout in the world of bold black and red nails.
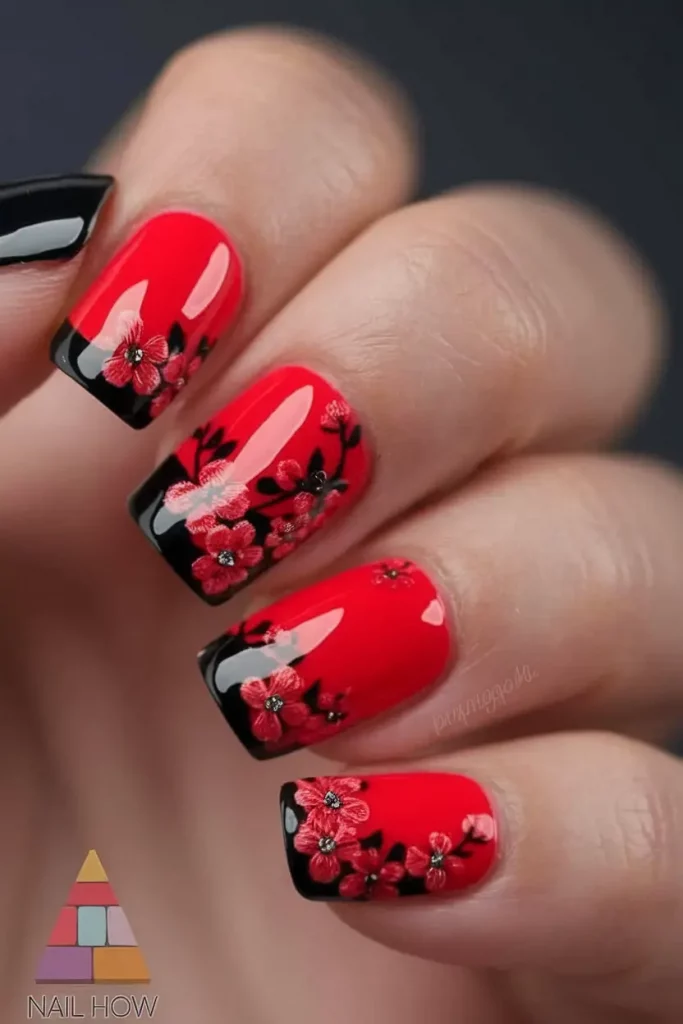
You’ll want a saturated red like “Flamenco” by Zoya and a jet-black polish with high opacity (I recommend Essie’s “Licorice”). A stamping plate or ultra-fine nail brush will help you map out the floral design, especially if you’re doing it freehand.
After applying your red base and curing it, use black polish to paint the tips, then overlay the blossoms starting from the corner. You can top it all off with a layer of Seche Vite for that ultra-glassy finish.
I’ve worn something similar for evening events, and it never fails to turn heads. These are bold red square nails with just enough softness to stay chic—not costume-y.
Petal Clusters with Delicate Whites
If red could bloom, this is what it would look like. Long nails coated in bright red, scattered with translucent white blossoms and delicate dot centers. These nails balance boldness with grace and fall squarely into that dreamy Pinterest board category for bold red nails design.
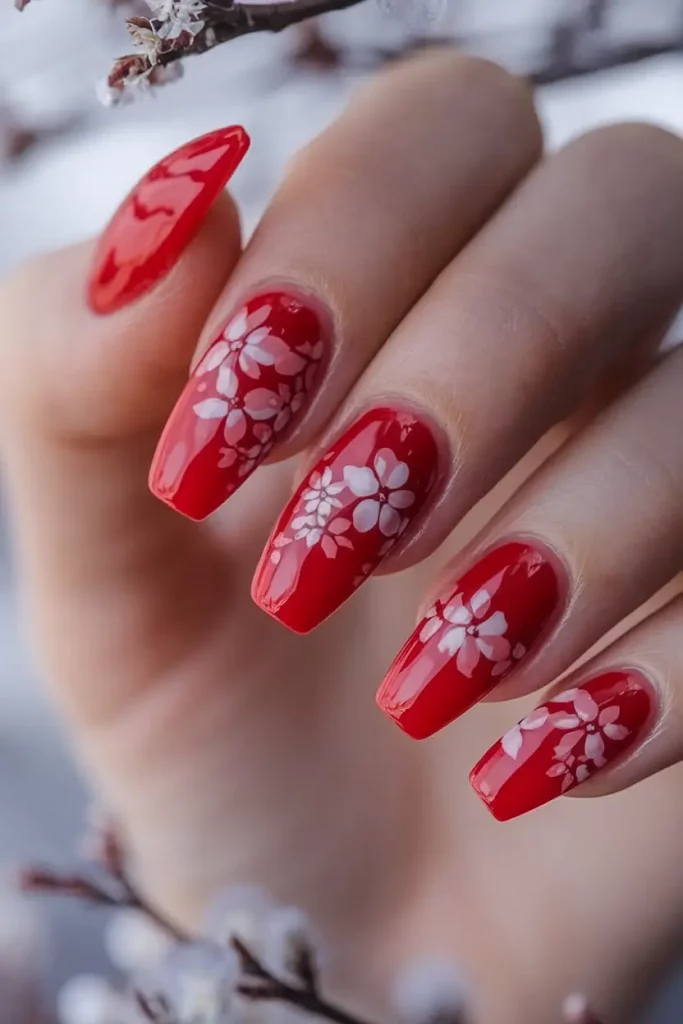
Use “Red-y or Not” from ILNP for that rich red base, and a sheer white polish for the flowers. I like to use a tiny dotting tool for each petal and a micro crystal or silver dot for the flower centers.
Paint the red base and let it fully cure. Then, layer the white petal clusters using soft taps—four to five per nail gives just enough floral drama without overcrowding. Gloss it up for a cohesive finish.
This one’s for those of us who love florals but don’t want to go full cottagecore. A great way to bring softness into bold red nails acrylic without losing the strength of the red.
Minimal & Modern Short Almonds
This is simplicity done right—short almond-shaped nails in a pure red shade that looks expensive, even without any art. It’s clean, elegant, and super wearable. And yes, it absolutely counts as bold red nails short, even if it’s not screaming for attention.
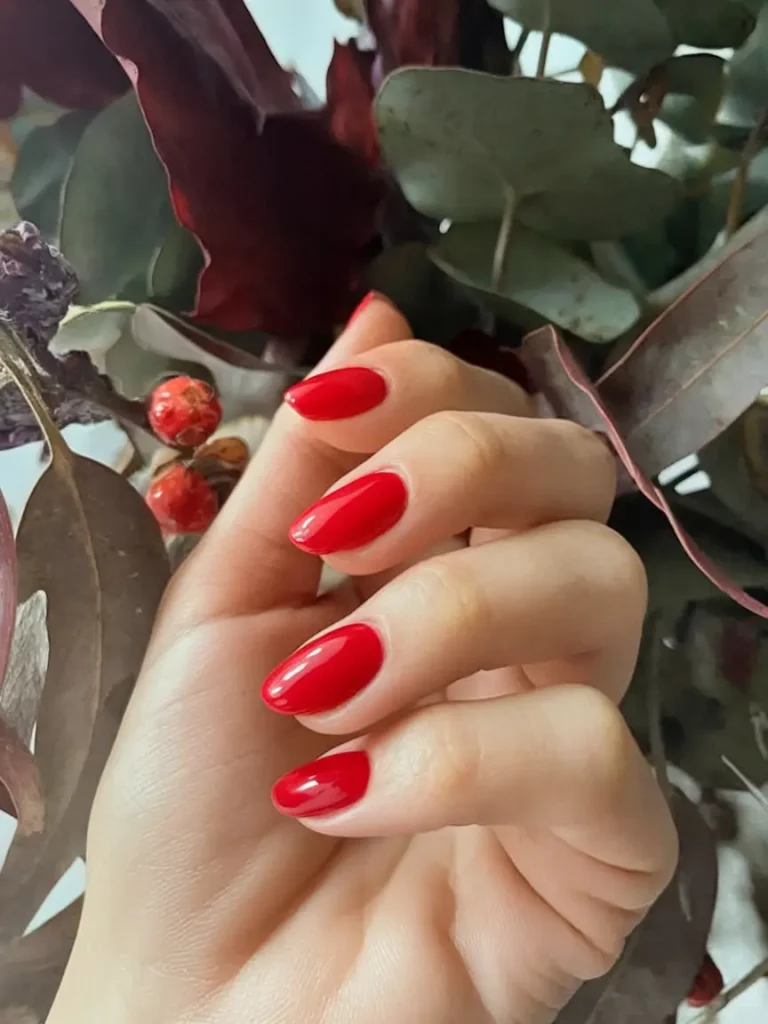
A single-color gel application in “Big Apple Red” by OPI or “Classic Red” from Bio Sculpture is perfect here. The gloss is key, so invest in a top coat that delivers long-lasting shine—something like CND’s Shellac “Duraforce.”
The trick with short almond shapes is perfect cuticle work and smooth shaping. The color is the star, so your prep needs to be flawless. Two coats of red, cured between each layer, plus top coat = done.
I lean on this exact shape and color for transitional weeks—when I want something timeless but not too trendy. These are bold red nails that work at brunch and in the boardroom.
Multi-Finish Mix with Nude Detail
This mix-and-match set combines glossy red, red glitter, and a nude accent with a sharp red half-moon tip. It’s playful, clean, and super summer-ready. The combination of finishes gives depth, while still being cohesive. This is your invitation to play around with textures under the bold red nails aesthetic.
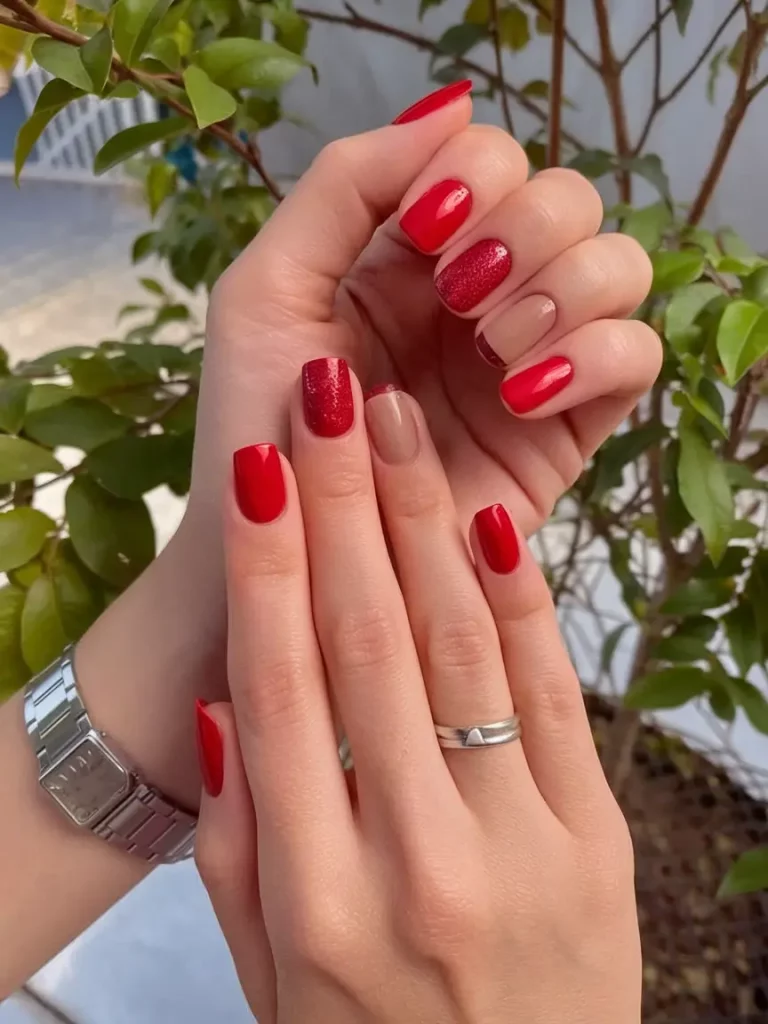
For the base red, go for “Ruby Pumps” by China Glaze—it gives you that sparkle pop. For the nude, “Beige Babe” by Sally Hansen makes a great pairing. Use striping tape for that crisp half-moon detail on the accent nail.
Paint each nail individually with its assigned look—no rules here, just balance. Use top coat generously to tie the whole thing together.
When I want to keep things fun but still look polished, I turn to mixed sets like this. It’s a small statement with major impact—and super easy to wear through the week without clashing with anything.
The Ultimate Glossy Almonds
This final look is the definition of sleek: ultra-glossy, pointed almond nails in a pure, saturated red. The shape elongates the fingers while the polish brings the drama. These are bold red almond nails turned all the way up.
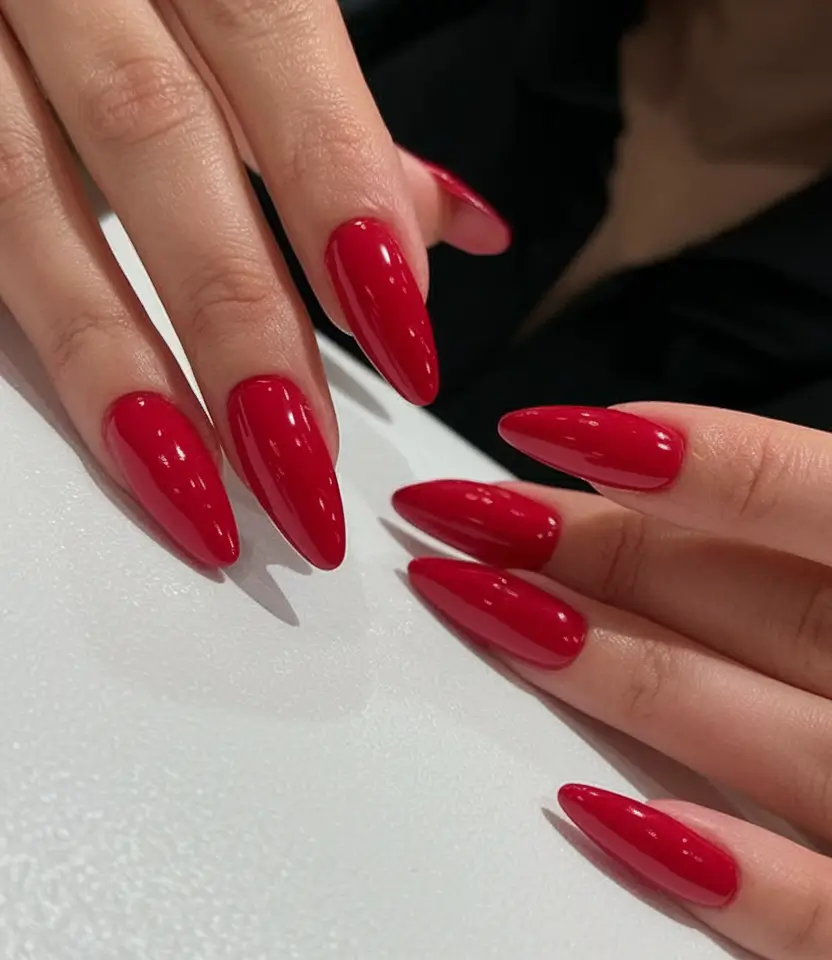
I’ve used “Scandal” by Dior Vernis for this before, and it’s stunning. Combine that with a rubber base for extra durability and a mirror-gloss top coat to really amplify the shine.
Shape the nails first into a uniform almond—this design works best when the curves are consistent. Apply two layers of red and finish with a UV-cured gloss top coat. No additional design needed.
Honestly? These nails make me feel like I’ve got everything under control. They’re bold, feminine, and a power move in polish form. When in doubt, this is the move.
Glossy Red with Abstract Nude Accent
The nails are done in a fiery red gloss, with a nude accent and black stripes added for a modern and chic touch. The almond shape gives it a lovely look, and the contrast makes it more interesting. It’s the perfect choice if you’re craving bold red almond nails with a minimal-artsy vibe.
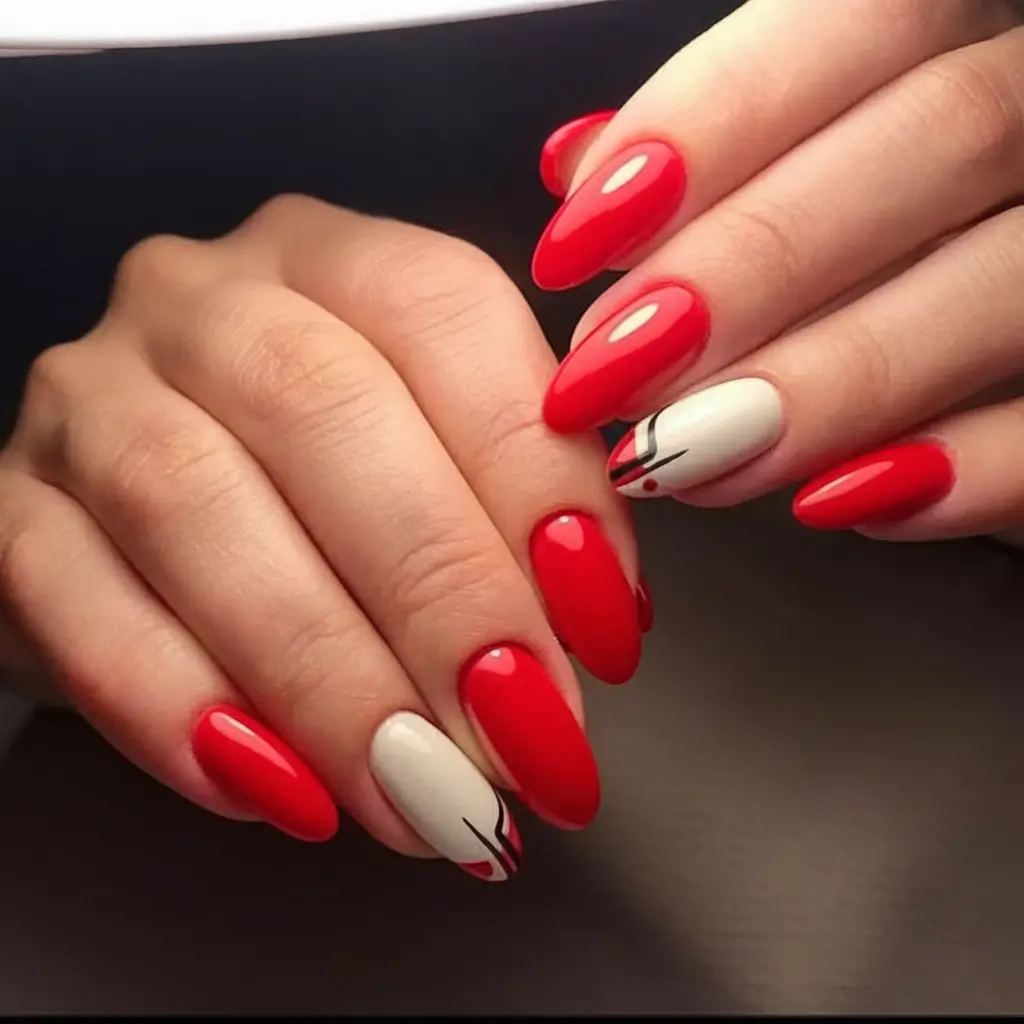
I often choose “Red Hot Rio” by OPI for a deep red, and add “Beige Beauty” by Orly for a nude touch. The fine black line work is easiest with a striping brush or pre-made nail stickers if you’re not into freehand detailing.
Begin by working with your red and nude base, then cure, and finally add your black stripes in one continuous motion. Less is more here. The glossy top coat finishes the look and makes it look like glass.
I would wear this kind of set to a gallery opening or a summer dinner. It’s bold, up-to-date, and exudes confidence in a stylish way.
Muted Red Square with Floral Art Accent
Here is a softer version of bold red that still feels elegant. This shade of red looks good on all skin types, and the white nail with a red floral outline creates a pretty, artistic effect. This color is perfect for anyone looking for bold berry red nails.
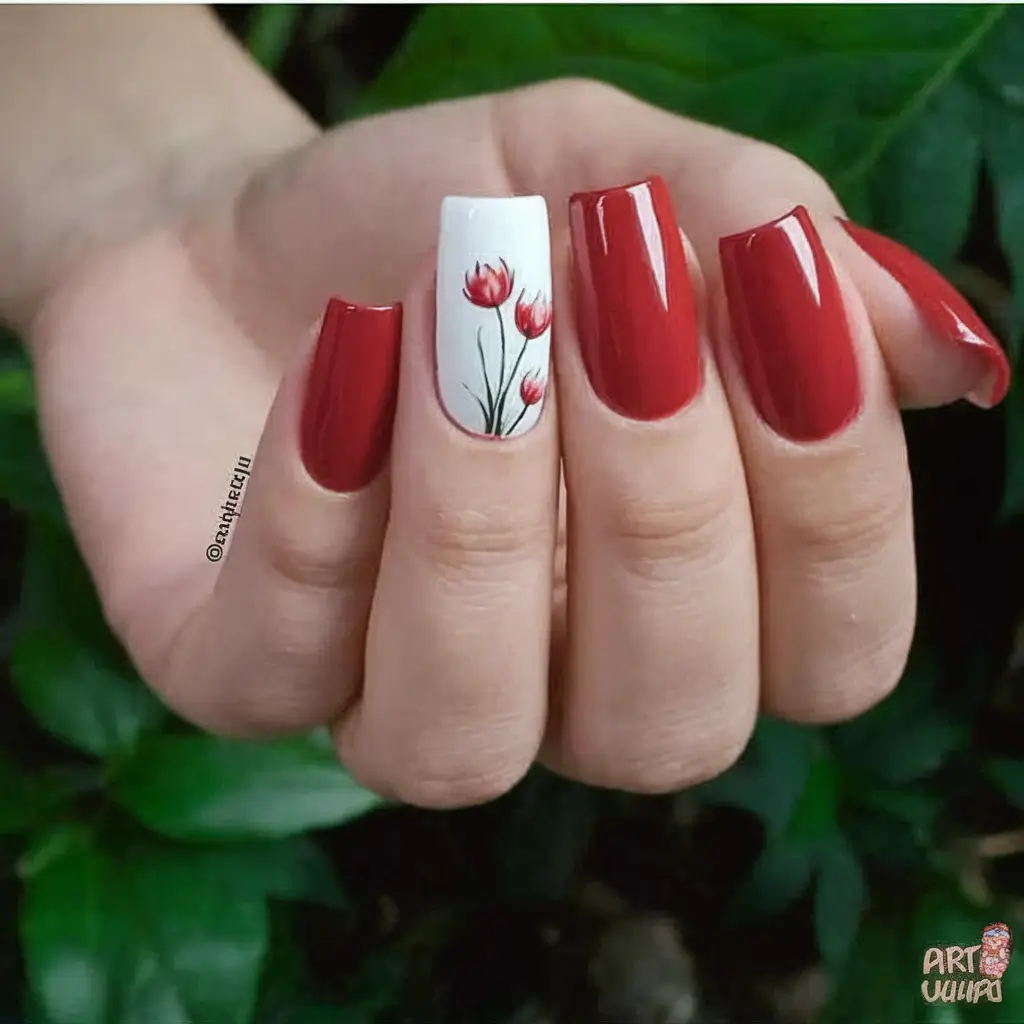
The red color here makes me think of “Rouge Essentiel” from Chanel, which is a bit dusty yet very elegant. You can either use stamping plates or paint the details of the stems with a fine brush for the flower art. A base of “Alpine Snow” white gel polish looks clean and neat.
Use berry red on most of the nails, leaving one nail unpainted for the white base. After the flowers are cured, paint them with a tulip design and give them a slight gradient to make them look more realistic. Gloss everything to seal and protect the look.
I really like to wear this set every day because it’s romantic and not too over the top, and the art detail always gets noticed by others. Plus, it transitions beautifully from summer into fall.
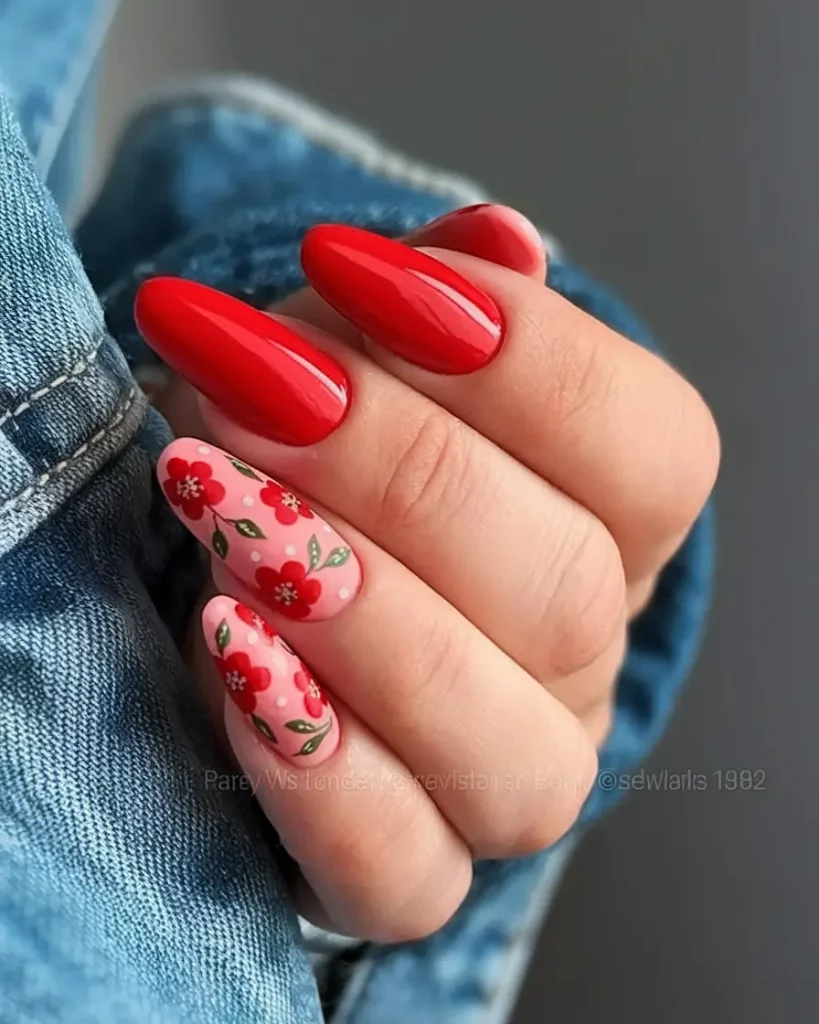
Bright Floral Accent on Classic Red Base
Let’s end on a happy note with red almond nails and two white nails decorated with pink and red flowers. These blooms feel like sunshine on your fingertips. If you’re a fan of bold red nails with a hint of fun, this design is for you.

Choose a bright red nail polish such as “Lady in Red” by Gelish, and for the florals, select a mix of red, coral, and pink colors over white. You can use dotting tools and tiny brushes to achieve the 3D effect on the petals.
Start by painting your red nails, let them dry, and then do the accent fingers. I always start by painting the center of the flower and then add the petals with a damp brush. You can add green or gold dots in the middle for more detail, if you wish.
This design always puts me in a good mood. It’s ideal for serving at a summer brunch, picnic, or just to add some happiness to your week. Definitely a fun twist on classic bold red nails.
Conclusion
Bold red nails for 2025 summer are more than just a trend—they’re a bold statement of style, mood, and personality. From short minimalist shapes to artistic floral designs and glossy acrylics, there’s a look for every vibe and occasion. Whether you’re into timeless elegance or playful accents, these red-hot ideas are here to inspire your next salon visit or at-home mani. Ready to go bold this summer?